Your first Codeigniter CRUD
If you are totally new to the codeigniter experience and you can't still understand the way that you can create a CRUD, this codeigniter CRUD tutorial is just for you. Below you will see with steps how to make grocery CRUD work and how to install it to a new project. All the examples below are for codeigniter 2.x but the same exact implementation stands for version 3.X as well.
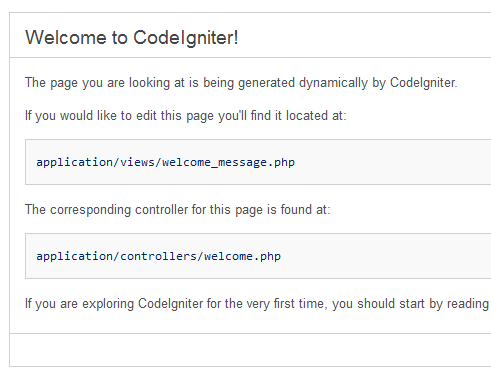
Step 1. First of all download codeigniter and make sure that you project have the welcome screen. So if your first screen of your project looks like the image below, you just installed codeigniter framework to your project.
2nd Step. Now we are ready to configure our database to our codeigniter project. The database connection for codeigniter can be configured at: your_project/application/config/database.php The file will look something like this:
<?php  if ( ! defined('BASEPATH')) exit('No direct script access allowed');
/**
 * CodeIgniter
 *
 * An open source application development framework for PHP 5.1.6 or newer
... mpla mpla mpla
*/

$active_group = 'default';
$active_record = TRUE;

$db['default']['hostname'] = 'localhost';
$db['default']['username'] = '';
$db['default']['password'] = '';
$db['default']['database'] = '';
$db['default']['dbdriver'] = 'mysql';
$db['default']['dbprefix'] = '';
$db['default']['pconnect'] = TRUE;
$db['default']['db_debug'] = TRUE;
$db['default']['cache_on'] = FALSE;
$db['default']['cachedir'] = '';
$db['default']['char_set'] = 'utf8';
$db['default']['dbcollat'] = 'utf8_general_ci';
$db['default']['swap_pre'] = '';
$db['default']['autoinit'] = TRUE;
$db['default']['stricton'] = FALSE;
$db['default']['failover'] = array();

/* End of file database.php */
/* Location: ./application/config/database.php */
So make sure that you have your database settings there. For example:
$db['default']['hostname'] = 'localhost';
$db['default']['username'] = 'root';
$db['default']['password'] = '1234'; //Pretty secure don't you think?
$db['default']['database'] = 'my_new_cms';
3rd Step. Let's create our first controller. Let's name our first controller Main. So to do that, you will go to your_project/application /controllers/ and add the Main.php , that will look like this:
<?php  if ( ! defined('BASEPATH')) exit('No direct script access allowed');

class Main extends CI_Controller {

    function __construct()
    {
        parent::__construct();

        $this->load->database();

    }

    public function index()
    {
        echo "<h1>Welcome to the world of Codeigniter</h1>";//Just an example to ensure that we get into the function
        die();
    }
}

/* End of file Main.php */
/* Location: ./application/controllers/Main.php */
To make sure that everything works fine, you have to go to http://localhost/your_project/index.php/main and see the message: Welcome to the world of Codeigniter. If you have an error like this:
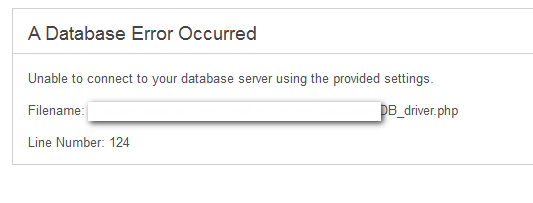
Then something goes wrong with the database connection, check your password and the username and try again. Step 4.Create your table in your database. Let's say we have the table with table name employees. The SQL code that you can insert is:
CREATE TABLE IF NOT EXISTS `employees` (
  `employeeNumber` int(11) NOT NULL AUTO_INCREMENT,
  `lastName` varchar(50) NOT NULL,
  `firstName` varchar(50) NOT NULL,
  `extension` varchar(10) NOT NULL,
  `email` varchar(100) NOT NULL,
  `officeCode` varchar(10) NOT NULL,
  `file_url` varchar(250) CHARACTER SET utf8 NOT NULL,
  `jobTitle` varchar(50) NOT NULL,
  PRIMARY KEY (`employeeNumber`)
) ENGINE=MyISAM  DEFAULT CHARSET=latin1 AUTO_INCREMENT=1703 ;

INSERT INTO `employees` (`employeeNumber`, `lastName`, `firstName`, `extension`, `email`, `officeCode`, `file_url`, `jobTitle`) VALUES
(1002, 'Murphy', 'Diane', 'x5800', 'dmurphy@classicmodelcars.com', '1', '', 'President'),
(1056, 'Patterson', 'Mary', 'x4611', 'mpatterso@classicmodelcars.com', '1', '', 'VP Sales'),
(1076, 'Firrelli', 'Jeff', 'x9273', 'jfirrelli@classicmodelcars.com', '1', '', 'VP Marketing'),
(1088, 'Patterson', 'William', 'x4871', 'wpatterson@classicmodelcars.com', '6', '', 'Sales Manager (APAC)'),
(1102, 'Bondur', 'Gerard', 'x5408', 'gbondur@classicmodelcars.com', '4', 'pdftest.pdf', 'Sale Manager (EMEA)'),
(1143, 'Bow', 'Anthony', 'x5428', 'abow@classicmodelcars.com', '1', '', 'Sales Manager (NA)'),
(1165, 'Jennings', 'Leslie', 'x3291', 'ljennings@classicmodelcars.com', '1', '', 'Sales Rep'),
(1166, 'Thompson', 'Leslie', 'x4065', 'lthompson@classicmodelcars.com', '1', '', 'Sales Rep'),
(1188, 'Firrelli', 'Julie', 'x2173', 'jfirrelli@classicmodelcars.com', '2', 'test-2.pdf', 'Sales Rep'),
(1216, 'Patterson', 'Steve', 'x4334', 'spatterson@classicmodelcars.com', '2', '', 'Sales Rep'),
(1286, 'Tseng', 'Foon Yue', 'x2248', 'ftseng@classicmodelcars.com', '3', '', 'Sales Rep'),
(1323, 'Vanauf', 'George', 'x4102', 'gvanauf@classicmodelcars.com', '3', '', 'Sales Rep'),
(1337, 'Bondur', 'Loui', 'x6493', 'lbondur@classicmodelcars.com', '4', '', 'Sales Rep'),
(1370, 'Hernandez', 'Gerard', 'x2028', 'ghernande@classicmodelcars.com', '4', '', 'Sales Rep'),
(1401, 'Castillo', 'Pamela', 'x2759', 'pcastillo@classicmodelcars.com', '4', '', 'Sales Rep'),
(1501, 'Bott', 'Larry', 'x2311', 'lbott@classicmodelcars.com', '7', '', 'Sales Rep'),
(1504, 'Jones', 'Barry', 'x102', 'bjones@classicmodelcars.com', '7', '', 'Sales Rep'),
(1611, 'Fixter', 'Andy', 'x101', 'afixter@classicmodelcars.com', '6', '', 'Sales Rep'),
(1612, 'Marsh', 'Peter', 'x102', 'pmarsh@classicmodelcars.com', '6', '', 'Sales Rep'),
(1619, 'King', 'Tom', 'x103', 'tking@classicmodelcars.com', '6', '', 'Sales Rep'),
(1621, 'Nishi', 'Mami', 'x101', 'mnishi@classicmodelcars.com', '5', '', 'Sales Rep'),
(1625, 'Kato', 'Yoshimi', 'x102', 'ykato@classicmodelcars.com', '5', '', 'Sales Rep'),
(1702, 'Gerard', 'Martin', 'x2312', 'mgerard@classicmodelcars.com', '4', '', 'Sales Rep');
Now that you inserted the table without any errors. Let's go to the next step. Step 5. Make sure that you have installed grocery CRUD correctly at your project by adding all the files and folders to your project. After the end of your installation, your project will have to look similar to this structure:
–––– application/
–––––––– config/
–––––––––––– autoload.php
–––––––––––– ...
–––––––––––– doctypes.php
–––––––––––– foreign_chars.php
–––––––––––– grocery_crud.php
–––––––––––– ...
–––––––– controllers/
–––––––––––– examples.php
–––––––––––– index.html
–––––––––––– welcome.php
–––––––– libraries/
–––––––––––– grocery_crud.php
–––––––––––– index.html
–––––––– models/
–––––––––––– grocery_crud_model.php
–––––––––––– index.html
–––––––– views/
–––––––––––– example.php
–––––––––––– index.html
–––––––––––– welcome_message.php
–––– assets/
–––––––– grocery_crud/
–––––––––––– css/
–––––––––––– js/
–––––––––––– texteditor/
–––––––––––– themes/
–––––––– uploads/
–––––––– index.html
–––– system/
–––– user_guide/
–––– change_log.txt
–––– example_database.sql
–––– index.php
–––– licence-grocery-crud.txt
–––– license.txt </div> For more you can also see at grocery CRUD installation. Step 6.Let's go to our controller and add some stuff to make grocery CRUD work. Add the method employees like the below example:
<?php  if ( ! defined('BASEPATH')) exit('No direct script access allowed');

class Main extends CI_Controller {

    function __construct()
    {
        parent::__construct();

        /* Standard Libraries of codeigniter are required */
        $this->load->database();
        $this->load->helper('url');
        /* ------------------ */

        $this->load->library('grocery_CRUD');

    }

    public function index()
    {
        echo "<h1>Welcome to the world of Codeigniter</h1>";//Just an example to ensure that we get into the function
        die();
    }

    public function employees()
    {
        $crud = new grocery_CRUD();
        $crud->set_table('employees');
        $output = $this->grocery_crud->render();

        echo "";
        print_r($output);
        echo "";
        die();
    }
}

/* End of file Main.php */
/* Location: ./application/controllers/Main.php */
stdClass Object
(
    [output] => Your output will appear here....
    [js_files] => Array
        (
            [763b4d272e158bdb8ed5a12a1824c94f494954bd] => http://grocery_crud/public/grocery_crud/themes/datatables/js/jquery-1.6.2.min.js
            [0b677f3fc6fb25b4baf39eb144222116c5b60254] => http://grocery_crud/public/grocery_crud/themes/flexigrid/js/cookies.js
            [ec3ae62b8d5838972e858fe54447bd4bd8d79f88] => http://grocery_crud/public/grocery_crud/themes/flexigrid/js/flexigrid.js
            [2c0ff56d0cbc6f80a5ef9c770d478f0e00c3170d] => http://grocery_crud/public/grocery_crud/themes/flexigrid/js/jquery.form.js
            [474495ff1e895eab81fb8afba4db9b06c15b19af] => http://grocery_crud/public/grocery_crud/themes/flexigrid/js/jquery.numeric.js
        )

    [css_files] => Array
        (
            [732b03aa54d124f062757b71e5560acdc5632ba6] => http://grocery_crud/public/grocery_crud/themes/flexigrid/css/flexigrid.css
        )

)
<!DOCTYPE html>
<html lang="en">
<head>
<meta charset="utf-8" />
<?php
foreach($css_files as $file): ?>
<?php endforeach; ?>
<?php foreach($js_files as $file): ?>
<?php endforeach; ?>
<style type='text/css'>
body
{
font-family: Arial;
font-size: 14px;
}
</style>
</head>
<body>
<div>
'>Offices |
'>Employees |
'>Customers |
'>Orders |
'>Products |
'>Films
</div>
</div>
<div>
<?php echo $output; ?>
</div>
<div>Footer</div>
</body>
</html>
So let's save this file into: your_project/application/views/our_template.php and go to our controller and add some more stuff.
<?php if ( ! defined('BASEPATH')) exit('No direct script access allowed');
class Main extends CI_Controller {
function __construct()
{
parent::__construct();
/* Standard Libraries of codeigniter are required */
$this->load->database();
$this->load->helper('url');
/* ------------------ */
$this->load->library('grocery_CRUD');
}
public function index()
{
echo "<h1>Welcome to the world of Codeigniter</h1>";//Just an example to ensure that we get into the function
die();
}
public function employees()
{
$crud = new grocery_CRUD();
$crud->set_table('employees');
$output = $crud->render();
$this->_example_output($output);
}
function _example_output($output = null)
{
$this->load->view('our_template.php',$output);
}
}
/* End of file Main.php */
/* Location: ./application/controllers/Main.php */
Now go to http://localhost/your_project/index.php/main/employees and you will see a result like this:
 That's it! Now go to the kitchen and grab a coffee or a beer (depends on the time really!). Lay back and enjoy the power of grocery CRUD in your project :)
Continue with tutorial and Basic Methods or go straight ahead to the
methods/functions for the full documentation of each function/method with at least one example for each .
Note: This tutorial is only to show how to install grocery CRUD to your project. If you have any questions about codeigniter issues , for example how to use views or controllers, please go to the user guide of codeigniter or post your question at the general forum
grocery CRUD, doesn't work?. You can see the known issues or you can see the video common mistakes when we install Grocery CRUD (part 1) or find the answer at grocery CRUD forums.
Still you can't install it? Ask your specific question to our really friendly community or send us a message at the support form and we will answer you as soon as possible.
That's it! Now go to the kitchen and grab a coffee or a beer (depends on the time really!). Lay back and enjoy the power of grocery CRUD in your project :)
Continue with tutorial and Basic Methods or go straight ahead to the
methods/functions for the full documentation of each function/method with at least one example for each .
Note: This tutorial is only to show how to install grocery CRUD to your project. If you have any questions about codeigniter issues , for example how to use views or controllers, please go to the user guide of codeigniter or post your question at the general forum
grocery CRUD, doesn't work?. You can see the known issues or you can see the video common mistakes when we install Grocery CRUD (part 1) or find the answer at grocery CRUD forums.
Still you can't install it? Ask your specific question to our really friendly community or send us a message at the support form and we will answer you as soon as possible.